

The Sino:bit is a derivative of the Calliope Mini, which is a derivative of the BBC Micro:bit.
It uses the same nRF51822 MCU from Nordic and to keep the compatibility at a maximum it also uses the same accelerometer and magnetometer.
It provides 2 user-readable buttons. It has a large matrix of LEDs for displaying whatever you want. This allows for the support of Chinese, Japanese, Hindi, Arabic, and other non-Latin character-based languages
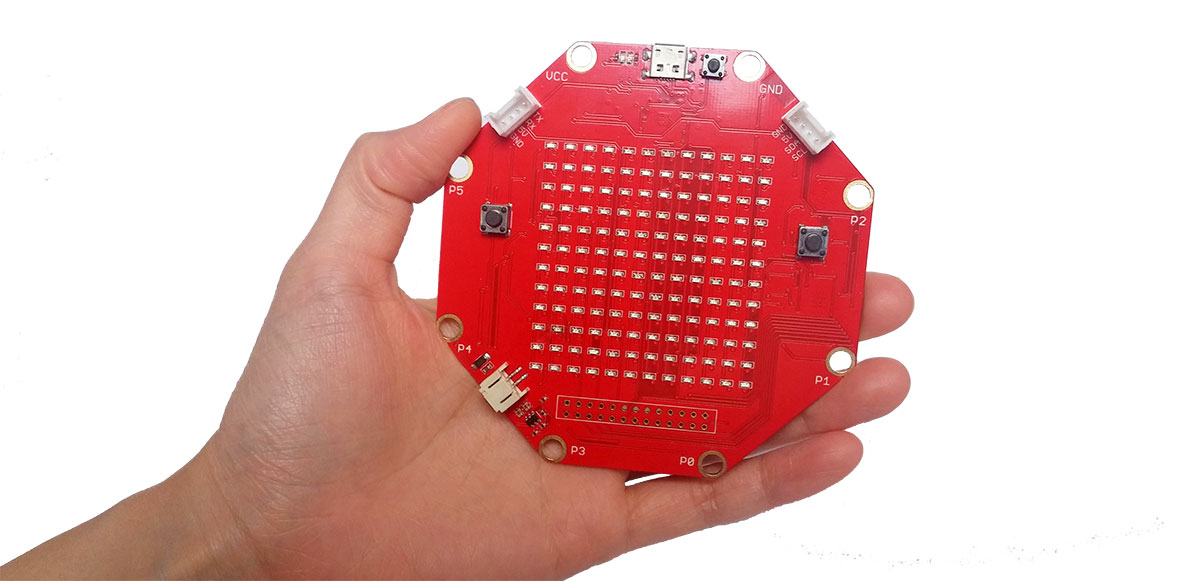
The Sino:bit has 3 pads/holes for alligator clips. You get a power and ground one but you also have 6 pads for I/O. The micro:bit exposes pins 0, 1, 2 whereas the sino:bit exposes pins 0, 1, 2, 3, 4, and 5.
The Sino:bit has a 12×12 LED matrix in place of a 5×5 matrix. The LED matrix is driven by a dedicated LED matrix driver chip instead of by the board’s CPU with the micro:bit. However, one important difference between the boards is that the micro:bit supports 10 levels of brightness for each individual pixel, whereas the sino:bit only supports 16 levels that apply to all pixels at once.
The sino:bit has grove style connectors for serial UART and I2C bus access which makes it easy to connect to many existing grove sensors.
The sino:bit exposes all of the processor’s GPIO pins through a 13×2 pin header near the bottom of the board, you will need to solder a header yourself here as it is unpopulated.
You do not get any pins on the bottom of the device like the microbit, so any external board will not work out of the box with the Sino:bit
Arduino
Download and install the Arduino IDE (At least v1.6.12)
Start the Arduino IDE
Go into Preferences
Add https://sandeepmistry.github.io/arduino-nRF5/package_nRF5_boards_index.json as an “Additional Board Manager URL”
Open the Boards Manager from the Tools -> Board menu and install “Nordic Semiconductor nRF5 Boards”
Select your nRF5 board from the Tools -> Board menu
NOTE: During installation it takes the Arduino IDE a few minutes to extract the tools after they have been downloaded, please be patient.
#include <sinobit.h>

Sinobit matrix = Sinobit();

void setup()
{
  Serial.begin(9600);

  matrix.begin();
  delay(100);
  matrix.clearScreen();
}

void loop()
{
  // set a pixel
  matrix.drawPixel(0, 0, 1);
  matrix.writeScreen();
  delay(500);

  // clear a pixel!
  matrix.drawPixel(0, 0, 0);
  matrix.writeScreen();
  delay(500);
}
Links
https://github.com/sinobitorg/hardware
https://www.elecrow.com/sino-bit-v1-0.html