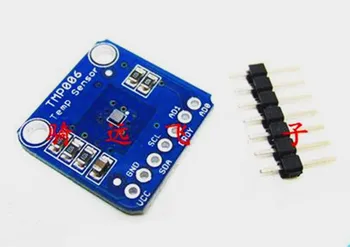
In this article we look at a temperature sensor – this time its the TMP006 and we will connect it to our Microbit
This is the sensor that I will be using
Lets look at some information regarding the sensor
Texas Instruments’ TMP006 is the first in a series of temperature sensors that measure the temperature of an object without the need to make contact with the object.
This sensor uses a thermopile to absorb the infrared energy emitted from the object being measured and uses the corresponding change in thermopile voltage to determine the object temperature.
Infrared sensor voltage range is specified from -40°C to +125°C to enable use in a wide range of applications. Low power consumption along with low operating voltage makes the part suitable for battery-powered applications.
The low package height of the chip-scale format enables standard high volume assembly methods, and can be useful where limited spacing to the object being measured is available.
Features
Complete single-chip digital solution, including integrated MEMS thermopile sensor, signal conditioning, ADC and local temperature reference
Digital output:
Sensor voltage: 7 µV/°C
Local temperature: -40°C to +125°C
SMBus™ compatible interface
Pin-programmable interface addressing
Low supply current: 240 µA
Low minimum supply voltage: 2.2 V
Parts Required
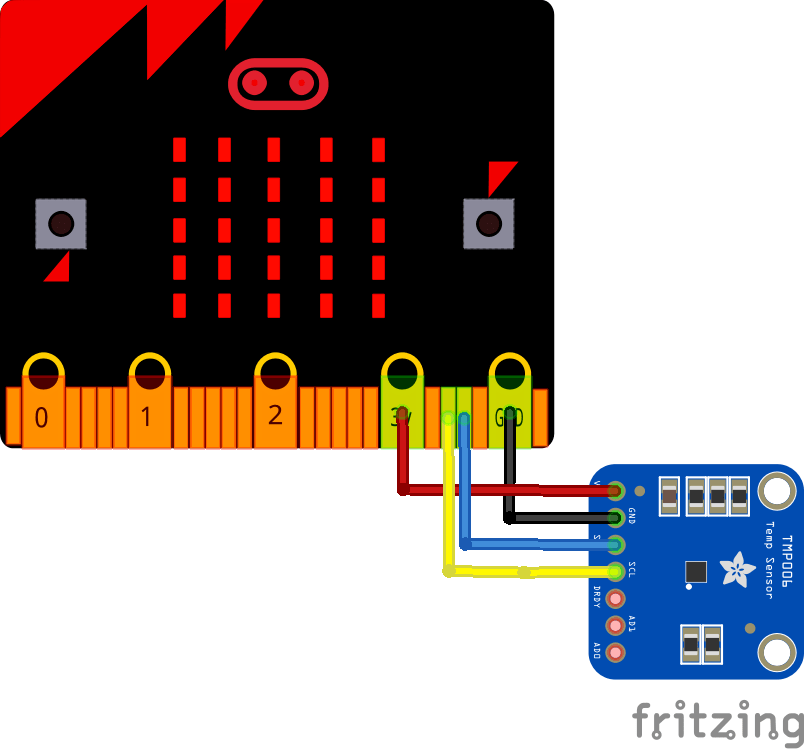
Once again for ease of use I connect an expansion board to the microbit, I feel this makes it easier to connect to a sensor like the one pictured above using connecting wire
Schematic/Connection

Code Example
This uses the library from https://github.com/adafruit/Adafruit_TMP006
[codesyntax lang=”cpp”]
#include <Wire.h>
#include <Adafruit_Sensor.h>
#include "Adafruit_TMP006.h"

// Connect VCC to +3V (its a quieter supply than the 5V supply on an Arduino
// Gnd -> Gnd
// SCL connects to the I2C clock pin. On newer boards this is labeled with SCL
// otherwise, on the Uno, this is A5 on the Mega it is 21 and on the Leonardo/Micro digital 3
// SDA connects to the I2C data pin. On newer boards this is labeled with SDA
// otherwise, on the Uno, this is A4 on the Mega it is 20 and on the Leonardo/Micro digital 2

Adafruit_TMP006 tmp006;
//Adafruit_TMP006 tmp006(0x41);  // start with a diferent i2c address!

void setup() {
  Serial.begin(9600);
  Serial.println("Adafruit TMP006 example");

  // you can also use tmp006.begin(TMP006_CFG_1SAMPLE) or 2SAMPLE/4SAMPLE/8SAMPLE to have
  // lower precision, higher rate sampling. default is TMP006_CFG_16SAMPLE which takes
  // 4 seconds per reading (16 samples)
  if (! tmp006.begin()) {
    Serial.println("No sensor found");
    while (1);
  }

  Serial.println("Send s to enter sleep mode, or w to wake up.  Measurements are not updated while asleep!");
}

void loop() {
  // Check for sleep/wake command.
  while (Serial.available() > 0) {
    char c = Serial.read();
    if (c == 'w') {
      Serial.println("Waking up!");
      tmp006.wake();
    }
    else if (c == 's') {
      Serial.println("Going to sleep!");
      tmp006.sleep();
    }
  }

  // Grab temperature measurements and print them.
  float objt = tmp006.readObjTempC();
  Serial.print("Object Temperature: "); Serial.print(objt); Serial.println("*C");
  float diet = tmp006.readDieTempC();
  Serial.print("Die Temperature: "); Serial.print(diet); Serial.println("*C");

  delay(4000); // 4 seconds per reading for 16 samples per reading
}
[/codesyntax]
Output
Open the serial monitor and you should see something like this
Die Temperature: 18.25*C
Object Temperature: 30.85*C
Die Temperature: 18.28*C
Object Temperature: 30.72*C
Die Temperature: 18.37*C
Object Temperature: 19.16*C
Die Temperature: 18.37*C
You can see the difference in the object temperature readings when it was pointing at my hand
Links

