

1.4K
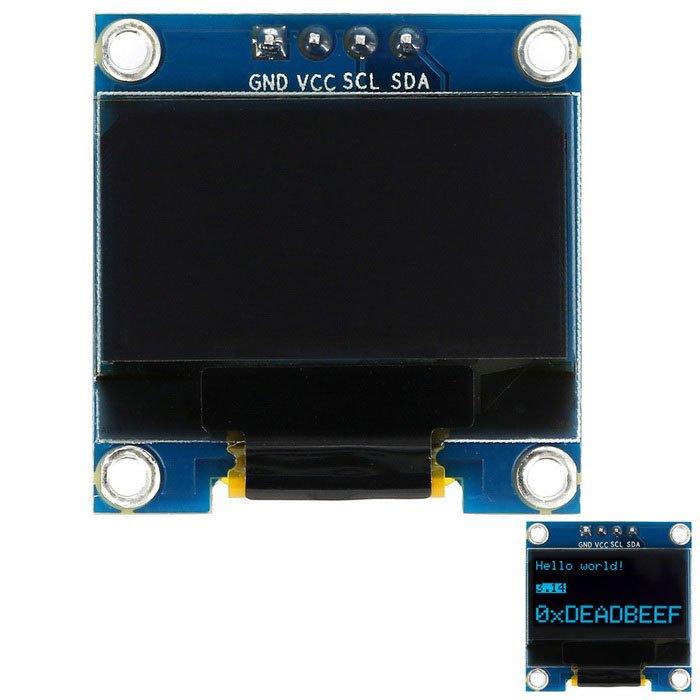
This example uses an OLED display these typically come in a couple of different sizes 128×32 and 128×64, this particular example will use the I2C connection from the Micro:bit to the display. There are a couple of libraries that make life easier.
Lets look at a typical oled display
oled
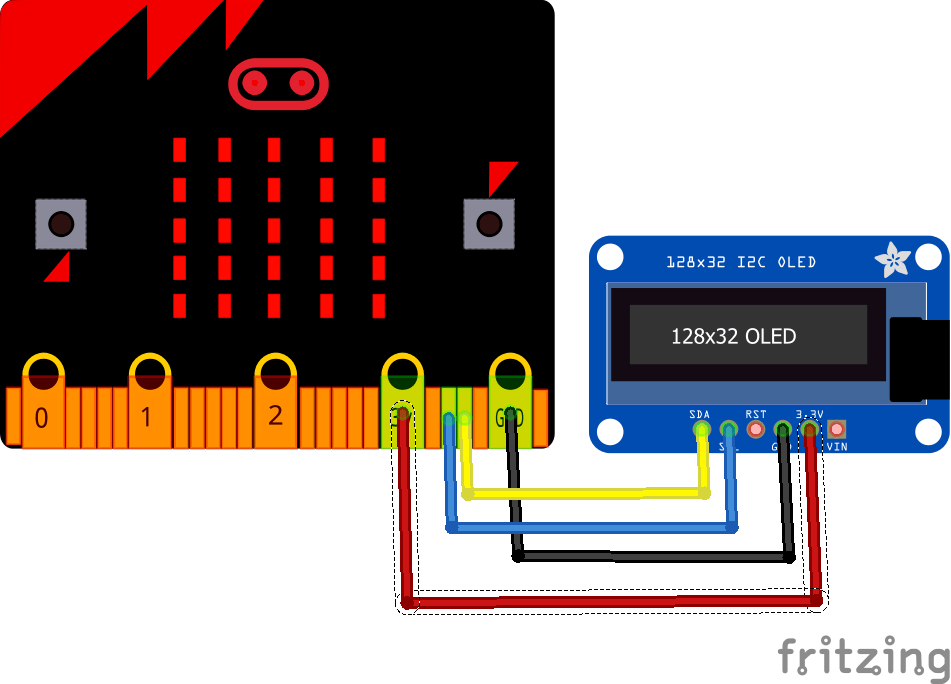
Connection
| Pin Label | micro:bit PIN | I2C Function | Notes |
|---|---|---|---|
| GND | Ground | Ground | 0V |
| VCC | Power | Power | Regulated 5V supply. |
| SDA | P20 | SDA | Serial data in |
| SCL | P19 | SCL | I2C clock |
This layout shows a 128×32
Code
This example uses the https://github.com/adafruit/Adafruit_SSD1306/archive/master.zip and https://github.com/adafruit/Adafruit-GFX-Library/archive/master.zip , theer are several built in examples. I have modified one just to display text as further examples will write text to a display
[codesyntax lang=”cpp”]
#include <SPI.h>
#include <Wire.h>
#include <Adafruit_GFX.h>
#include <Adafruit_SSD1306.h>

#define OLED_RESET 4
Adafruit_SSD1306 display(OLED_RESET);


void setup()
{
  Serial.begin(9600);
  // by default, we'll generate the high voltage from the 3.3v line internally! (neat!)
  display.begin(SSD1306_SWITCHCAPVCC, 0x3C);  // initialize with the I2C addr 0x3C (for the 128x32)
  // init done
  display.clearDisplay();
  // text display tests
  display.setTextSize(1);
  display.setTextColor(WHITE);
  display.setCursor(0,0);
  display.println("Hello, world!");
  display.setTextColor(BLACK, WHITE); // 'inverted' text
  display.println(3.141592);
  display.setTextSize(2);
  display.setTextColor(WHITE);
  display.print("0x");
  display.println(0xDEADBEEF, HEX);
  display.display();
  display.clearDisplay();

}


void loop()
{

}
[/codesyntax]
Link
1Pcs 128X64 OLED LCD LED Display Module For Arduino 0.96″ I2C IIC SPI Serial new original