

In this article we look at a Mini Piano Module that you can connect to your micro:bit.
The module uses a TTP229 which has 13 touch keys connected to it through an I2C interface, the board also has 4 WS2812B RGB LEDs fitted to it which can display 16777216 colors. There is also a buzzer fitted to the board which can play a note depending on whatever key you press.
In the following image you can see me using the module
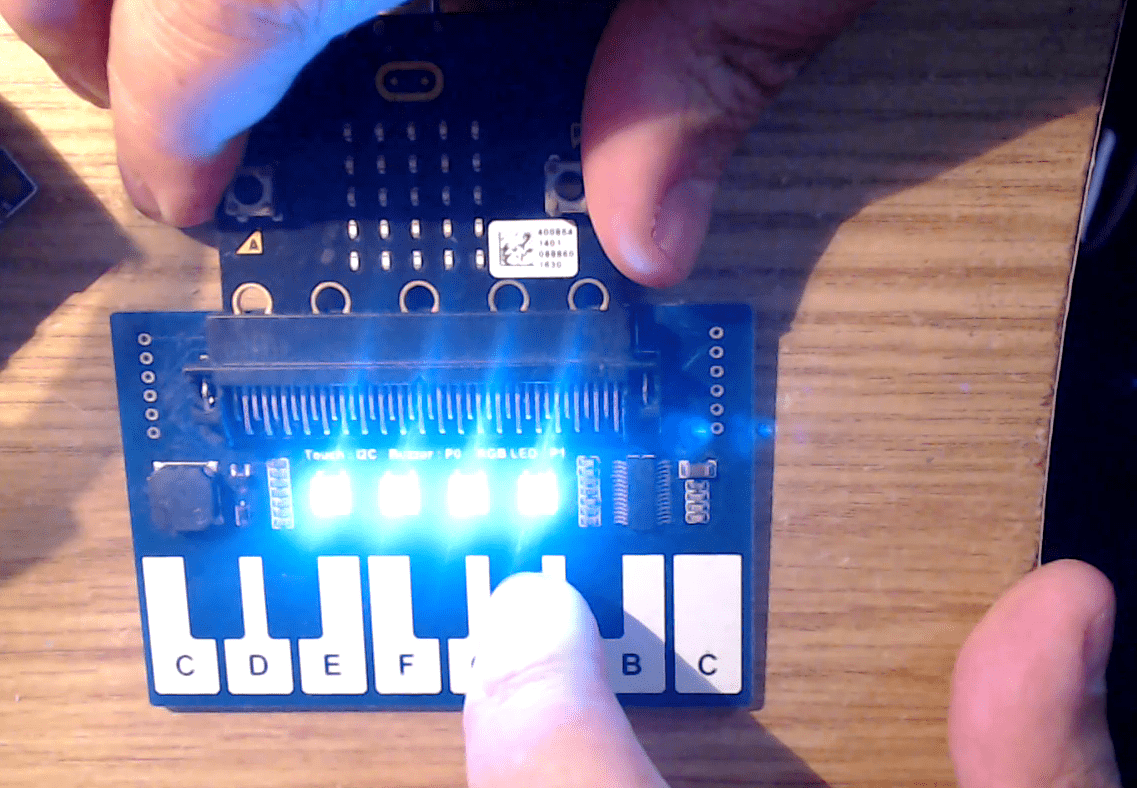
microbit piano
Parts List
The piano module costs about $17, so you can get this and a micro:bit for under $40. Here are a couple of links to the products
Pinout
The module connects through an edge connector and uses the following pins
| micro:bit pins | DESCRIPTION |
|---|---|
| VCC | 3.3V input |
| GND | Ground |
| P0 | Buzzer control pin |
| P1 | LED control pin |
| SCL | Touch keys control pin, I2C clock |
| SDA | Touch keys control pin, I2C data |
Code
The waveshare wiki has some code example and instructions on using the Block editor but here is a python example based on a user code example.
Copy this into the micro:bit python editor at https://python.microbit.org/v/1.1 , now click on download and drag the hex file to the drive that was created on your PC when your micro:bit was plugged in, the hex file will be programmed into your micro:bit and you should have a working mini piano
[codesyntax lang=”python”]
# Add your Python code here. E.g.
from microbit import *
import neopixel
import music
from random import randint

rgb = neopixel.NeoPixel(pin1, 4)

class PIANO():
    def __init__(self):
        #The piano key corresponds to the touch screen value.
        self.Zero = 0x0000
        self.C    = 0x0001
        self.bD   = 0x0002
        self.D    = 0x0004
        self.bE   = 0x0008
        self.E    = 0x0010
        self.F    = 0x0020
        self.bG   = 0x0040
        self.G    = 0x0080
        self.bA   = 0x0100
        self.A    = 0x0200
        self.bB   = 0x0400
        self.B    = 0x0800
        self.C1   = 0x1000
        self.play = self.Zero

    def TouchPress(self):
        try:
            arr = i2c.read(0x57, 2)
            val = arr[0] + arr[1] * 256
        except OSError:
            val = 0xffff
        return val

    def ShowRGB(self,RGB):
        for rgb_id in range(0, 4):
            rgb[rgb_id] = (RGB[rgb_id][0], RGB[rgb_id][1], RGB[rgb_id][2])
            rgb.show()

    def Color(self):
        red   = randint(0, 30)
        green = randint(0, 30)
        blue  = randint(0, 30)
        for rgb_id in range(0, 4):
            rgb[rgb_id] = (red, green, blue)
        return rgb

    def PlayPiano(self):
        TPval = self.TouchPress()
        if TPval & self.play != 0:
            TPval = TPval & self.play
        elif TPval == self.C:
            self.ShowRGB(self.Color())
            music.pitch(262, wait=False)
        elif TPval == self.bD:
            self.ShowRGB(self.Color())
            music.pitch(277, wait=False)
        elif TPval == self.D:
            self.ShowRGB(self.Color())
            music.pitch(294, wait=False)
        elif TPval == self.bE:
            self.ShowRGB(self.Color())
            music.pitch(311, wait=False)
        elif TPval == self.E:
            self.ShowRGB(self.Color())
            music.pitch(330, wait=False)
        elif TPval == self.F:
            self.ShowRGB(self.Color())
            music.pitch(349, wait=False)
        elif TPval == self.bG:
            self.ShowRGB(self.Color())
            music.pitch(370, wait=False)
        elif TPval == self.G:
            self.ShowRGB(self.Color())
            music.pitch(392, wait=False)
        elif TPval == self.bA:
            self.ShowRGB(self.Color())
            music.pitch(415, wait=False)
        elif TPval == self.A:
            self.ShowRGB(self.Color())
            music.pitch(440, wait=False)
        elif TPval == self.bB:
            self.ShowRGB(self.Color())
            music.pitch(466, wait=False)
        elif TPval == self.B:
            self.ShowRGB(self.Color())
            music.pitch(494, wait=False)
        elif TPval == self.C1:
            self.ShowRGB(self.Color())
            music.pitch(523, wait=False)
        elif TPval == self.Zero:
            rgb.clear()
            music.stop()
        if TPval != 0xffff:
            self.play = TPval

Piano = PIANO()
while True:
    Piano.PlayPiano()
[/codesyntax]
The code is also available from https://github.com/getelectronics/Microbitlearning
Video Usage
Here you can see me testing the piano module, this is using the code example above
Links
User manual – https://www.waveshare.com/w/upload/a/a4/Piano_for_microbit_User_Manual_EN.pdf